Art Market Prep
I’ve done quite a few art markets/craft fairs now, and I’ve learned so much from personal experience and from speaking with other vendors. So I’ve put together this handy lil resource that tells you how to prepare a stall for an art market or a craft fair!
First up, let's talk about your art and products
Before you delve too far into making arrangements to sell at a market, make sure you have enough items. You don’t wanna be turning up to a market with only 5 items and then end up not even breaking even after paying for your stall. When you’re first starting out, I’d recommend at least
- 10 - 20 items if they’re larger items such as sculptures or textiles, painted canvases.
- 30 - 50 items for medium sized items or a mix of small and medium items, such as crochet pieces or stationery
- And 50+ items for digitally printed items like stickers, greetings cards, bookmarks, art prints.
Next, are you happy with letting go of your art?
Once you’ve taken stock of all of your work, make sure all of the art and products you’re hoping to sell are all things you think you’d be happy to actually sell and part ways with forever (mostly applies to one off pieces not digitally printed work). Art is a very personal thing, and it can be difficult to let go of certain pieces, so make sure that everything that you’re planning to sell, you’d be happy to let go of, because once you’ve made that sale, there’s no getting it back.
Picking an event and signing up!
Okay now for a bit of admin, but it’s exciting admin! Whether it's a craft fair, an art market, or an artist alley at a convention, you need to choose an event! I started off locally which is the case with most vendors as there’s less financial risk. They often cost less, and they’re not as busy so less demanding and less nerve wracking.
For me I live in a relatively big city so I have quite a lot of options for selling art work locally, and to learn about places that actually host art markets, I searched Facebook, event tribe and by going directly to website of places I’d seen markets held before such as at museums, art galleries and community centres.
However! If you’re feeling a bit more risky, and have a bit of a higher budget! I’d highly recommend checking out a market through the Craft and Flea, The indie collectives as well as events such as comic cons or gaming conventions like EGX if your art has a bit of a nerdy/geeky side to it.
I’m sure there are more organisers, but these are the ones I have experiences with so far. But markets where you’re paying a bit more, around £50 for craft and flea and upwards of £200 for comic cons so definitely more financial risk, but you do get a lot more traffic coming to those events, because the price you’re paying is actually to help the organisers, actually organise the event, pay the staff, and advertise the event! You also have more established vendors going to these events who also help contribute to the advertising as they’ll have their own following. So the more advertised an event is, the more likely the chances of you making some sales!
My first art market cost me £10 to sell my work, and I didn’t need to bring a table or need to hire one. So I thought as long as I make back that £10 I’ve not lost anything other than my time, and anything else after that is a bonus! To my surprise, I ended up making a whopping £165!! I was blown away by the response I got and felt very grateful!
Personally I’d recommend starting off with a smaller market first, especially if you’re neurodivergent, because it can be a little overwhelming at the bigger markets because you’re speaking with lots of people all day. But maybe you’re super extroverted and love the hustle and bustle, and if you have plenty of stock then maybe it’s worth paying a little more for higher traffic markets.
Find out the size of your space
Once you’ve secured your space at the market of your choice, you’ll need to find out how big your space is, and whether or not you need to bring your own table and chairs, and if it’s outside or not.
If the venue lets you use their own tables and chairs, this takes some of the leg work out for you! No need to carry a heavy table and chairs from your car, just your stock! But if you have to bring your own you’ll need to know what size space you have so that you bring the right size table. Most art markets will say you’re allowed a 6ft x 2.5ft space (this doesn’t include the space behind your table) this is the actual size of your table, but confirm with the venue/organisers just incase.
Gather your supplies!
- A card reader, or a card reader app that you can use just on your phone. I personally take card payments using a card reader using Square, but other vendors I’ve spoken to use zettle or sumup. A card reader isn’t 100% necessary as some people will come to art markets with cash, however the majority of my sales, people have wanted to, or can only pay by card and you could miss out on a sale if you don’t have the ability to take payments via card. I think I paid £15 a few years ago for my card reader but I’ve seen some card readers are around £20.
- Bags for your customer - Again not 100% necessary but this helps you to seem more professional and it definitely helps customers out a lot, and you can get creative with this. You can either simply bring recycled carrier bags with you, that you’ve been hoarding in your kitchen and don’t know what to do with. Or if you’re an eco warrior and only use canvas bags (pop off queen!) Then you might wanna invest in some kind of paper bag for your customers to take away their goodies in. I used these brown paper bags and I stamped my logo on them for small items but I’ve now switched over to bags that have my brand colours in just to add a little more fun to the customer experience. I also have these bigger bags just in case a customer buys multiple items. You could also make your own paper bags using leftover rolls of wrapping paper/newspaper/packaging paper.
- Some inspo!
- Protective packaging of some sort This one only really applies if you have any delicate items that could break while the customer is out shopping. But I’d recommend either recycling your old bubble wrap from any parcels you get, or using paper, or tissue paper. You don’t wanna have a customer come back at a future market saying how the items they bought from you didn’t last the journey home, so help the customer to keep anything more delicate/fragile a little more padded.
- Display stands These can be made out of cardboard for your first market (I’ll explain what I did for my first market, in the next section) but if you do have a bit of a higher budget than what I did when I first started, you could buy a few market displays like these ones that I now have.
- A cash float - (If you’re not going to be taking a card reader, then this one is definitely essential!) So for those of you who haven’t heard this term before. A cash float is an amount of money that you bring with you, and use to help make sure your business runs smoothly. It’s money you’ll first need to invest into your business, and it’ll help you to be able to give customers their change. You’ll want to make sure that your cash float has enough variety in coins and/or notes, I usually bring at least £50 with me to all of my art markets in a mix of £10, £5 notes, £1 coins, 0.50p’s. If you’re going to be pricing some of your items at £1.50 or £2.50 etc and someone tries to pay you with a £5, £10 or £20 note, you’ll need to make sure you have the ability to give them the correct change, and still have change left over for more customers who pay in cash.
- Somewhere to keep your cash (preferably on you in case of thieves) I usually bring a small handbag with me that I can keep my phone, card reader and cash in.
- Power bank and cables - you don't want your phone going dead and no be able to take anymore card payments!
- A helper! (ask someone with plenty of notice if they can come with you) it’s a lot easier to do a market when you have a friend, partner or family member with you. Even if it’s just to help you get settled in and then they can head off once you’re all set up. You can do it alone of course! It’s just a lot easier with help! Even if it’s just for a bit of moral support at the start. Don’t be afraid to ask for help! You can pay them with snacks and good vibes if they stay with you the whole day, and depending on your profits, you could even give them a little payment as a thank you, or treat them to a gift from one of the other vendors (a great way to support your fellow vendors, and show appreciation to your helper).
- Something to carry your items - A suitcase, trolley cart, canvas bags with boxes (all preferably waterproof) to carry your items
- A table (but this may not be the case if they provide them) Some venues don’t hire out tables, or if they do it comes at a cost, so find out if it’s worth buying your own table, but check with the organisers, what size space you have. As standard, most art market tables are 6ft x 2.5ft.
- Some kind of table cloth, This helps your items stand out more, hides the underneath of your table where you're storing your stuff, and helps you look a bit more professional, You can get a tablecloth that stretches over your table so the table cloth doesn’t move about, however I’ve found that when I do events where I don’t need to bring my own table, sometime their tables are bigger than the standard size so I don’t have one of these purely for this reason.


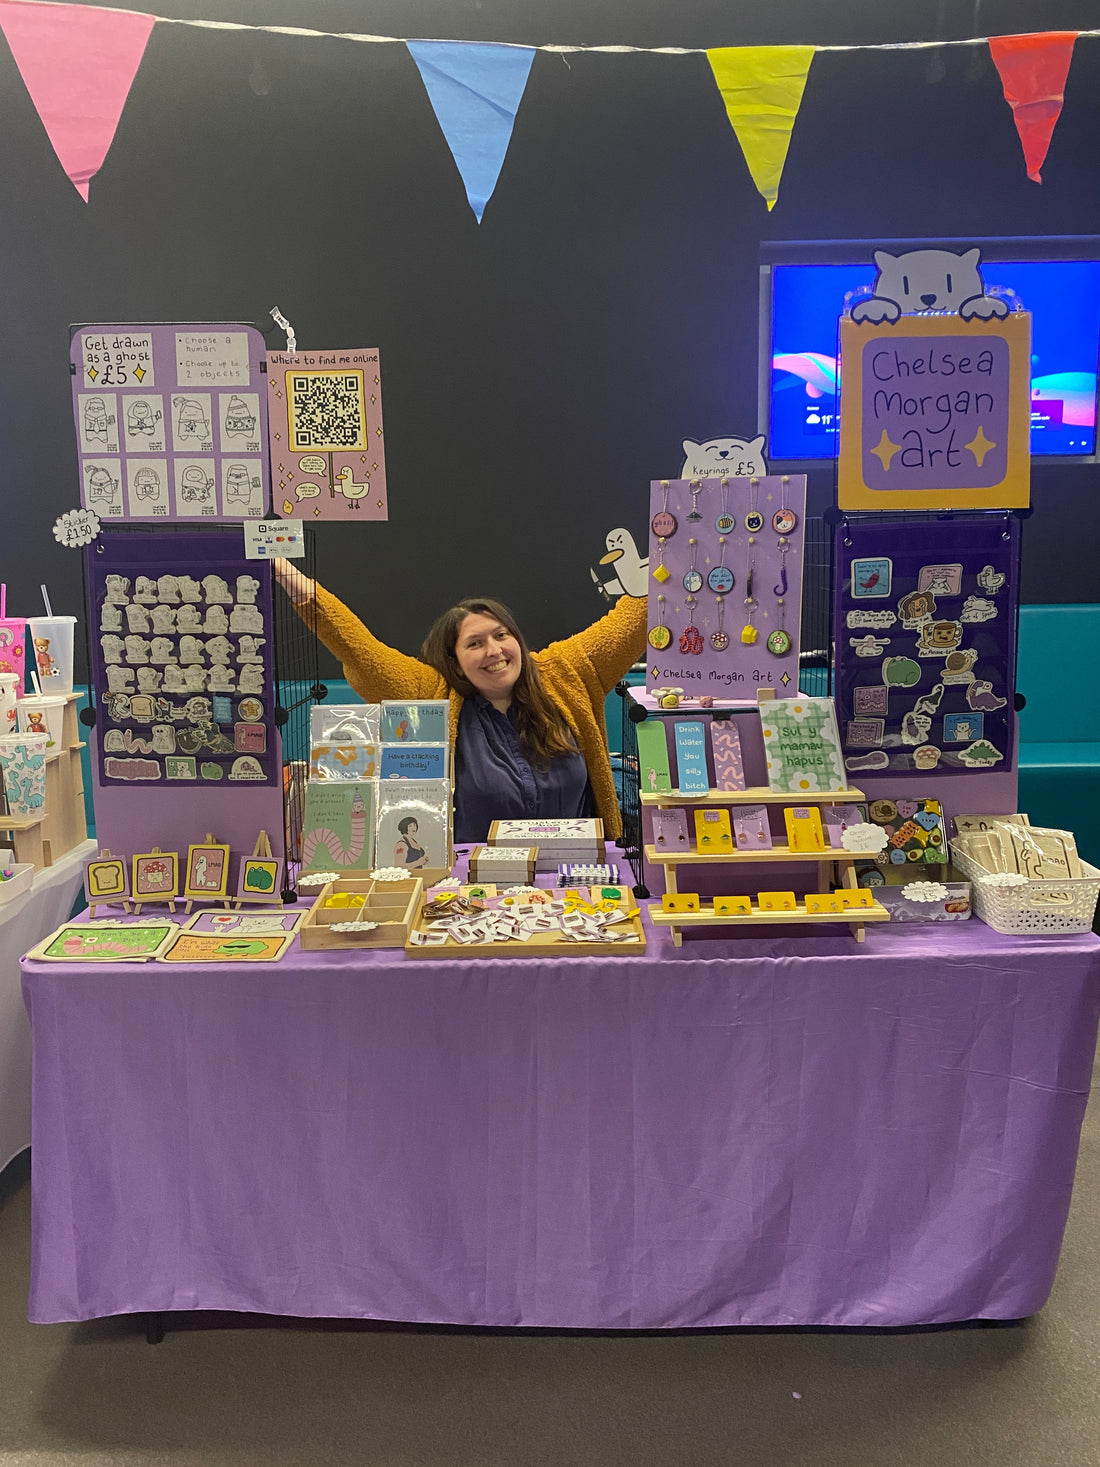
Preparing your displays
One of the key things I learned about setting up my stall was to make sure I had different heights/layers to display my work.
Everything laid out flat on the table is okay, but it’s not ideal. Your work isn’t going to stand out next to the other vendors. It’s less likely to attract people to your stall from further away because they can’t actually see anything. Even just propping some things up on shoeboxes can make a huge difference! But ideally you’re going to wanna get yourself some display stands.
This doesn’t have to cost a lot, you can choose to buy premade displays like the ones I have on my wishlist here. Or you can do what I did for my first market, and make everything myself using bits I had laying around.
For my first market this is what I did:
- I made greetings card/print displays out of cardboard that I then painted with my brand colours.
- I wrapped an old flat baking sheet in paper that I stole from my kitchen to display my clay magnets, and I made a stand for it using scrap wood that I screwed together.
- I made this necklace holder again using a bunch of scrap wood that I screwed together and glued pegs to.
- I used some old tins that I painted to display my handmade crochet hooks.
- And I used things around the house like bowls and baskets to display bigger items.
You can get creative with your first market if you’re on a budget or don’t want to spend money on displays that you might not use again. Pinterest was amazing for getting ideas too so be sure to check out homemade art market displays for some inspo!


My display tends to change quite often, cause I like to try out new products, and seeing if a busy stall is more successful than a more minimal stall, I like to play around with different display stands and see what fits my products best. But from my very first market I’ve stuck with the same colour scheme, and this will help you to build your brand and become recognisable, and build trust with your customers.
So if possible, have a think about what your brand colours are, and try to keep going with the same colours, even if it’s just starting off with the table cloth, or one of your display stands.
Test run of your display
Now that you have everything, it’s time to do a test run of your display so you know what you’re doing on the day of the market! Spend some time playing with different set ups, and stand back from your display, so that you get a better idea of how a customer will see your stall from far away.
Think about where you’re going to keep your packaging, whether that’s just under your table, or if you have any displays that you can store stuff behind, you can use that to your advantage and it will help packing your customer’s stuff be a little smoother.
Signs and prices
Once everything is set up on your table you’ll need to think about how to display the prices of your items. I’ll be making another blog post soon talking about how to price your items properly, so keep an eye out for future blogs, and sign up to my newsletter for updates.
For my first market, I decided to go with 2 simple brand colours (I chose more later on) but one of my brand colours was yellow, so I just used a bunch of yellow cards that I folded over to act as my price display signs.
I tried making a price menu as well, but found that no one looked at it, and even with prices next to each of my items, customers would still ask how much things cost, so I decided to give up the price menu because it took up valuable space on my table.
You’ll also need to add all of your items to your card reader app of choice. This will make things easier on the day, rather than having to remember all of the prices of everything, you’ll have access to it all on your phone. So spend some time inputting your items, including photos of your items.
Another thing that’s super helpful but not necessary is a sign directing people to where to find you online. If you don’t have any social media accounts for your business, I’d highly recommend setting one up before your market, as this will help people find you later on if they want to buy more of your work. You can then make a little sign with your social media handles, and even set up your own qr code!
Pack up your stuff ready for the market!
Once your prices are up, that's your market ready to go! Take a picture of your stall before packing it all away so that you’ve got it to reference on the day of your market in case you get flustered. I managed to take all of my items and displays to a market in one big suitcase, but for my first market, everything was brought in, in canvas bags and an abandoned granny shopping trolley I found outside my studio that I painted. Use what you have access to!
I’ll be making another blog post soon about tips and tricks for the day of your market.